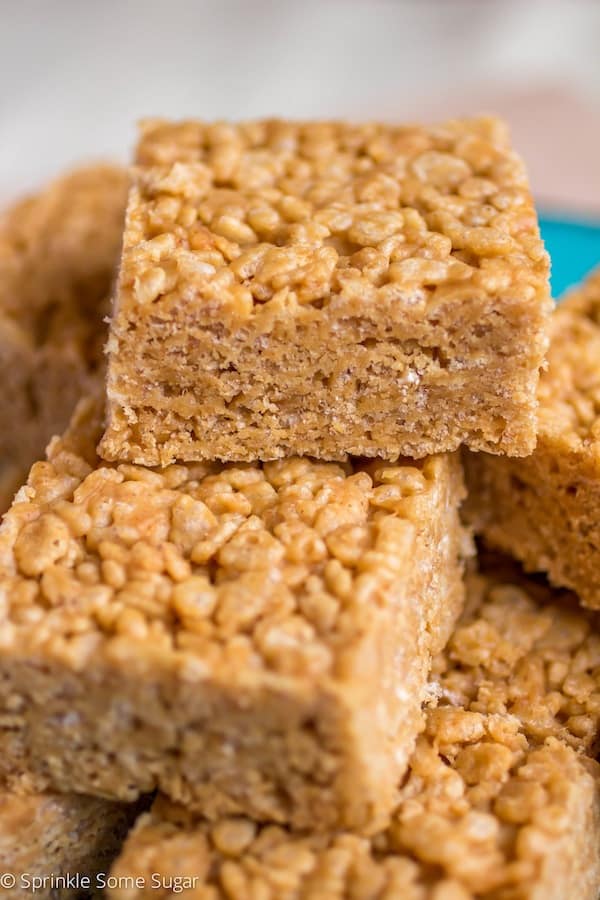
Unlocking the Irresistible Charm of Peanut Butter Honey Rice Krispie Treats
Imagine a treat that perfectly balances sweet and salty, offers a delightful crunch with every bite, and requires absolutely no baking. That's precisely what you get with
peanut butter honey rice krispie treats. More than just a simple snack, these no-bake wonders are a nostalgic callback to childhood favorites, elevated by the creamy richness of peanut butter and the natural sweetness of honey. Whether you're a seasoned baker or a complete novice in the kitchen, mastering this recipe will earn you endless accolades. This comprehensive guide will walk you through every step, ensuring your homemade treats are nothing short of perfection.
Why Peanut Butter Honey Rice Krispie Treats Are a Must-Try
The enduring popularity of Rice Krispie treats is undeniable, but the addition of peanut butter and honey elevates them to a whole new level of deliciousness. This dynamic duo transforms a simple cereal bar into a sophisticated yet comforting dessert that appeals to all ages.
*
No-Bake Brilliance: One of the biggest advantages is that no oven is required. This makes them perfect for hot summer days, quick dessert cravings, or when you simply don't have time for a complex baking project. The entire process, from start to finish, can be completed in under 30 minutes, plus cooling time.
*
Flavor Harmony: The combination of nutty peanut butter with the floral notes of honey creates a truly unique and addictive flavor profile. The slight saltiness of the peanut butter cuts through the sweetness, resulting in a perfectly balanced bite that's hard to resist. This isn't just a sweet treat; it's a symphony of tastes.
*
Texture Triumph: The crispy texture of the cereal, enveloped in a chewy, sticky peanut butter honey mixture, provides a satisfying mouthfeel. It's that perfect blend of crunchy and gooey that makes these treats so incredibly moreish.
*
Customizable and Versatile: While the classic version is fantastic, these treats are a blank canvas for customization. From different types of nut butter to various mix-ins, the possibilities are endless. They're ideal for parties, lunchboxes, or simply as an indulgent treat for yourself.
Gathering Your Ingredients: The Sweet & Nutty Essentials
Crafting the perfect batch of
peanut butter honey rice krispie treats starts with selecting the right ingredients. While the list is short and simple, the quality of each component can significantly impact the final taste and texture.
Here's what you'll need:
*
Rice Krispies Cereal: The star of the show! Ensure your cereal is fresh for maximum crispiness. Stale cereal will result in a less satisfying texture.
*
Peanut Butter: Creamy peanut butter is typically preferred for a smoother, more uniform texture. However, chunky peanut butter can add an extra dimension of crunch and nuttiness. Natural peanut butter (the kind that separates) can work, but you might need to adjust the butter/honey ratio slightly as it's often drier. For best results, a processed peanut butter (like Jif or Skippy) tends to be more consistent for no-bake recipes.
*
Honey: Any good quality liquid honey will do. Lighter honeys will impart a more delicate sweetness, while darker honeys (like buckwheat or clover) will offer a more robust flavor. Honey not only adds sweetness but also contributes significantly to the chewy texture.
*
Unsalted Butter: This provides richness and helps to create the gooey binder for your treats. Using unsalted butter allows you to control the salt content precisely.
*
Vanilla Extract: A touch of vanilla elevates all the other flavors, adding a warm, aromatic depth that makes a huge difference. Don't skip it!
*
Pinch of Salt: Crucial for balancing the sweetness and enhancing the peanut butter flavor. Even if your peanut butter is salted, a little extra pinch can truly make the flavors sing.
For those looking to explore variations or make these treats align with specific dietary preferences, remember that the core components can be adapted. For a deeper dive into ingredient choices and their impact on your final product, you might find valuable insights in our article on
Secrets to Irresistible PB Honey Rice Krispie Treats.
Step-by-Step Guide to Perfect Peanut Butter Honey Rice Krispies
Ready to get sticky and create some magic? Follow these detailed instructions to whip up a batch of the most delicious
peanut butter honey rice krispie treats you've ever tasted.
- Prepare Your Pan: Grease a 9x13-inch baking pan with butter or non-stick cooking spray. For easier removal and cleaner cuts, you can also line the pan with parchment paper, leaving an overhang on the sides.
- Measure Your Cereal: Place 6 cups of Rice Krispies cereal in a large, heatproof mixing bowl. Set aside.
- Melt the Wet Ingredients: In a large saucepan or Dutch oven, melt 1/2 cup (1 stick) of unsalted butter over medium-low heat. Once melted, stir in 1/2 cup of honey and 1 cup of creamy peanut butter.
- Simmer and Stir: Continue to cook the mixture over medium-low heat, stirring constantly, until it is smooth and well combined. Bring the mixture to a gentle simmer (small bubbles forming around the edges) for about 1 minute. Do not boil vigorously, as this can make the treats too hard. The brief simmer helps the sugars to properly dissolve and integrate, creating a more cohesive, chewy treat.
- Add Flavorings: Remove the saucepan from the heat. Stir in 1 teaspoon of vanilla extract and a pinch (about 1/4 teaspoon) of salt. Mix until fully incorporated.
- Combine with Cereal: Pour the warm peanut butter honey mixture over the Rice Krispies cereal in the large mixing bowl. Using a spatula, gently fold and stir until the cereal is evenly coated. Work quickly but gently to avoid crushing the cereal.
- Press into Pan: Transfer the mixture to your prepared 9x13-inch pan. Using a buttered spatula or your lightly buttered hands (this prevents sticking), press the mixture down firmly and evenly into the pan. Even pressure is key for uniform squares. For tips on achieving that perfect balance of chewy and crispy, you might find our article Secrets to Irresistible PB Honey Rice Krispie Treats particularly useful.
- Cool and Cut: Let the treats cool completely at room temperature for at least 1-2 hours, or place them in the refrigerator for about 30 minutes to speed up the process. Once fully set, lift them out of the pan using the parchment paper overhang (if used) or cut directly in the pan. Slice into 12-24 squares, depending on your desired size.
Tips for Achieving the Ultimate Texture and Flavor:
- Don't Overcook the Syrup: Cooking the butter, honey, and peanut butter mixture for too long or at too high a heat can make your treats excessively hard or rock-like once cooled. A gentle simmer for just a minute is usually sufficient.
- Fresh Cereal is Best: Stale cereal loses its crispness, resulting in a duller texture. Always use fresh Rice Krispies for that satisfying crunch.
- Even Pressure: When pressing the mixture into the pan, apply firm, even pressure. This helps create a dense, cohesive treat that won't fall apart. Don't press too hard, however, or you'll compact them excessively.
- Cool Completely: Patience is a virtue here! Cutting the treats before they are fully cooled and set can lead to them falling apart or being overly sticky.
- Storage: Store your peanut butter honey rice krispie treats in an airtight container at room temperature for up to 3-4 days. They tend to get a bit softer over time but remain delicious.
Elevating Your Treats: Creative Twists and Serving Suggestions
While the classic
peanut butter honey rice krispie treats are a masterpiece on their own, there's always room for a little creative flair. These treats are incredibly adaptable, allowing you to customize them to your taste or for specific occasions.
Creative Twists:
- Chocolate Drizzle: Melt some semi-sweet or milk chocolate chips with a tiny bit of coconut oil or butter, then drizzle generously over the cooled treats. A sprinkle of flaky sea salt on top of the chocolate takes it to gourmet levels.
- Add-Ins Galore: Once the cereal is coated but before pressing into the pan, fold in some fun extras. Think mini chocolate chips, chopped pretzels for extra salty crunch, mini marshmallows, or even dried cranberries for a chewy, tart element.
- Nut Butter Alternatives: Experiment with different nut butters like almond butter or cashew butter for a different flavor profile. Just be aware that natural nut butters might alter the texture slightly, so you may need to adjust the amount of butter or honey.
- Sweetener Swap: While honey offers a unique flavor and texture, you could try experimenting with maple syrup for a different kind of sweetness. Keep in mind that maple syrup is thinner, so adjustments might be needed for consistency. If you're looking for even more ways to adapt this recipe for specific dietary needs or preferences, exploring options like those detailed in Healthier Twist: Honey Peanut Butter Krispie Treats could provide excellent inspiration.
- Spice It Up: A tiny pinch of cinnamon or nutmeg can add a subtle warmth, especially appealing during fall or winter months.
Serving Suggestions:
- Classic Squares: Simply cut into squares and serve on a platter for a crowd-pleasing dessert at any gathering.
- Party Favors: Wrap individual treats in decorative cellophane bags with a ribbon for charming party favors or bake sale items.
- Dessert Bar: Cut them into smaller bites and arrange them on a dessert bar alongside other confections like cookies and brownies.
- Elevated Plating: For a more sophisticated presentation, serve a single square with a scoop of vanilla bean ice cream and a drizzle of caramel sauce.
Conclusion
From their delightful crispiness to their perfect balance of sweet and savory,
peanut butter honey rice krispie treats are an undeniable classic. Easy to make, incredibly versatile, and universally loved, they offer a quick and satisfying solution for any dessert craving or gathering. By following these simple steps and incorporating our helpful tips, you're now equipped to create a batch that will impress everyone who takes a bite. So, gather your ingredients, get ready to embrace the sticky fun, and enjoy the pure deliciousness of these irresistible no-bake wonders. Happy treat making!